
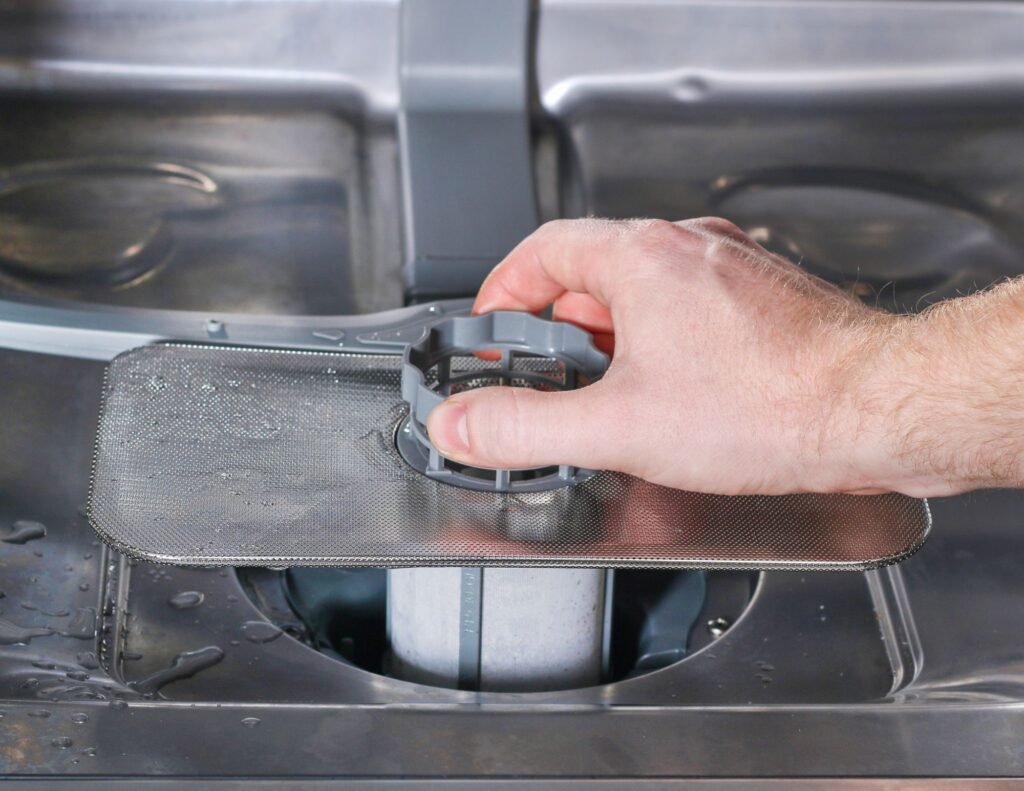
Using your dishwasher can be a complete game changer for freeing up time in a busy life. Still, after the dishes are cleaned, that gunk, buildup, and grime have to go somewhere. That final resting spot is your dishwasher filter; cleaning it can be as easy as using dishwasher cleaner tablets. Still, a few lesser-known methods can get it squeaky clean without replacing the filter.
What Is the Best Way to Clean a Dishwasher Filter? (Quick Steps)
The simplest method for “how to clean dishwasher filter” is to remove it directly from the assembly, which can be tricky to locate on some models. Once you’ve found it, place it in an appropriately sized bowl or container with white vinegar or citric acid cleaner to break down most buildup into wipeable blobs. If your dishwasher still smells afterward, or if you notice the dishes still dirty after the initial clean-up, you may need a soft scrub brush or bottle brush to work those problem areas.
Ideally, you want the filter to look as close as possible to its out-of-the-box condition when you are done, especially if you’ve used the methods above with dishwasher cleaner tablets. The main part of cleaning is scrubbing everything thoroughly and cleaning the sump area afterward, since the filter itself may not be the root cause of unwanted smells or grime left on dishes.
Where Is the Dishwasher Filter Located for Each Major Brand?
Similar to most appliances and even vehicles, certain parts change places and are easier or harder to reach depending on who makes them, or even better, where they originate; in most cases, the dishwasher filter can be seen at the bottom of the tub itself. Although unique brands or builds, such as elevated dishwashers or wall-mounted variants, do exist, the filter typically stays in the same location.
Below, we’ll briefly cover where you can find the filter on most mainstream brands and share tips and tricks to help if you are constantly asking, “Where is the dishwasher filter?”
1. Whirlpool
As one of the older dishwashers in the business, Whirlpool has kept things relatively easy when it comes to locating your dishwasher filter, commonly located in the center of the tub directly underneath the spray arms; it’s difficult to miss. Still, models vary: some Whirlpool models place it in a corner, usually toward the back in smaller models; and there’s also. Finally, you may have purchased a self-cleaning model, in which case there’s no dishwasher filter to access.
Older models may be a bit more problematic to clean, as they have food traps screwed in place and require some finesse to remove and clean without dropping screws or other integral pieces into exposed openings.
2. KitchenAid
KitchenAid dishwashers have a duality: older models still use the durable yet annoying style trap that requires screws to remove to access the trap itself. Interestingly, newer models have maintenance-free filter systems that remove the guesswork of cleaning them out entirely; regardless of how old your dishwasher is, the filter is usually in the middle of the tub, but you’ll likely need to remove the drawers and spray arm to access it.
3. Maytag
Despite the popularity, Maytag dishwashers have two very distinct features regarding their filter placement: for one, they are typically located in the back corner as opposed to being in the center of the tub, and secondly, there is almost always a “Two-layer” system in place, requiring you to remove the filter assembly before gaining direct access to the filter itself.
The process for reaching the filter varies by model. Still, it’s imperative to note that, like most dishwashers, older models have screwed-in plates that will need to be manually removed before you can clean them, assuming they need cleaning in the first place.
4. Bosch
Thankfully enough, Bosch keeps things as simple as possible, with almost all of their models having the filter located squarely in the middle of the tub, directly beneath the spray arm, requiring little to no effort to twist and pull the filter assembly out and get it ready for a nice soak and scrub combo to eliminate any foul odors that might be building up down there.
5. GE
GE is known for innovative designs and a dedication to durability; unfortunately, that same innovation has led to considerable design changes over the years, especially regarding the location (or lack thereof) of the dishwasher filter. In most units, the common center-placed filter is true, with the standard method of twisting the cap and removing the filter as the go-to way to clean it.
Alternatively, there may be some models that have built-in self-cleaning functionality, which you won’t ever need to clean yourself unless something gets clogged, or another part in that vicinity gets damaged, which will necessitate removing the cleaner itself, but that is a job usually more catered toward a repair specialist, and may void any active warranties if you attempt to do it yourself.
6. Samsung
It’s hard to imagine a product line, or series of units, that Samsung isn’t actively producing or has produced in the past. Dishwashers are still an industry they’re very much involved in, and they keep up with their competitors.
The dishwasher filter for Samsung series units is located in the center of the tub, with the typical expectation of older units being tough old fellas, needing you to unscrew a piece or two to get access to the filter itself; amongst the Samsung specifically, it is the sprayer arm itself that will likely need to come off, assuming anything needs to be removed in the first place.
7. LG
In much the same way that their brand is remarkably named, owning an LG does make your life good, especially when it comes time to clean that messy filter, with almost all models having the simple twist-off knob granting easy access to the filter for cleaning; you couldn’t ask for things to be more simplistic. As always, older models may be more complicated, with the usual extra elbow grease in screws to remove, but it is more of an expectation than a surprise at this point.
8. Frigidaire
The Frigidaire dishwasher filter is located in the bottom center. Pull out the bottom rack, and you will see it. Most Frigidaire filters are removable, but if they aren’t, check the user’s manual to confirm the filter can be removed. Some Frigidaire filters twist off, while others lift straight up, making the process straightforward.
9. Thermador
Unlike the above, Thermador dishwashers might get you a little hot under the collar when you try to clean things out, since they typically require you to unscrew the original filter area to remove the filter for cleaning, which isn’t complicated. Still, for those of us who are lazy, or simply all thumbs, it can be a tiring and bothersome experience overall.
10. Cove
Last but certainly not least, we have Cove. Despite their name, you aren’t living in a cave by owning one. Granted, you will need to remove the spray arm to access the filter you so desperately need to clean (or at least want to clean in some cases). After that, the process is straightforward, and putting it back together after a good scrub is just as easy as removing it; like most dishwashers, the filter is in the middle of the tub.
How Often Should You Clean a Dishwasher Filter?
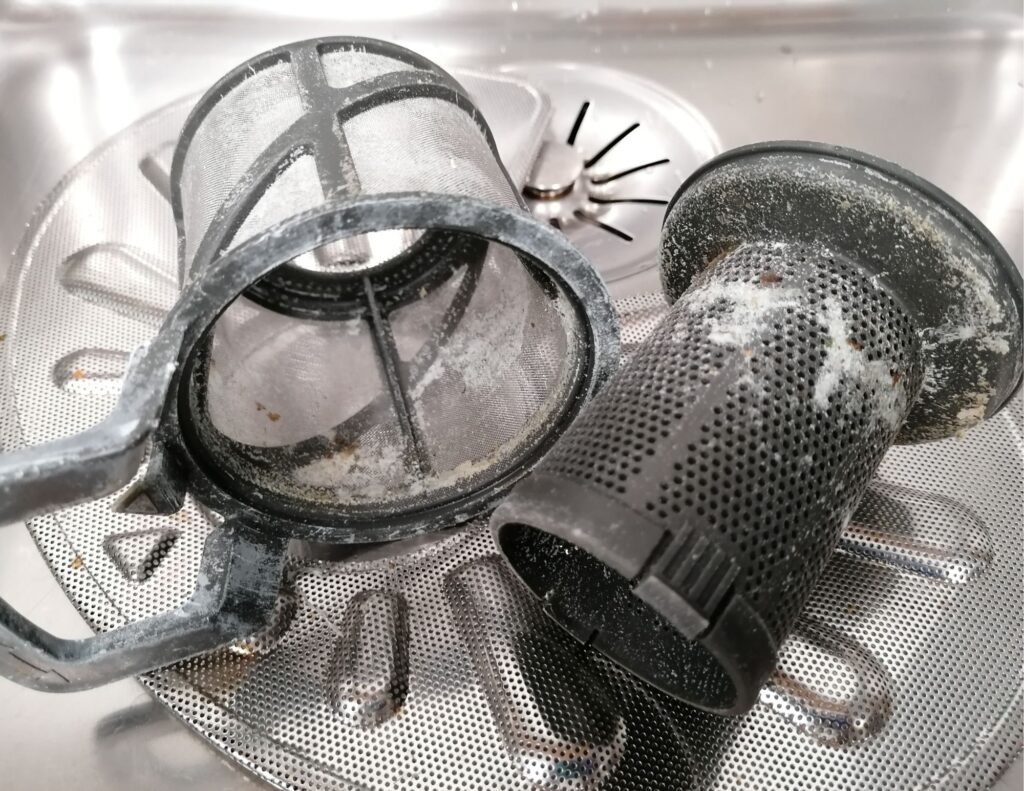
In an ideal setting, assuming you are doing roughly four to seven loads a month, you’d be wise to clean your filter every month to avoid causing enough buildup on it to start generating a smell, or worse, leaving bacteria and germs on your dishes.
Households that run their dishwashers more often, or have larger families, might want to clean their dishwasher every two weeks if you are doing twice that amount, or once a week if you are doing upwards of fourteen loads a week.
A good indicator that it may be time to get the suds out and put some work in would be that expected foul odor, visible food particles, slime, or weird textures on plates and dishes, or even large amounts of water pooling in the bottom of your basin (which is almost always an indicator of food remnants clogging the filter itself, or the area leading to it.
What Are Some Signs Your Filter Is Clogged?
Doing a deeper dive into how to accurately know when you need to whip out the nitrile gloves and get into full cleaning mode, we’ll glance over the most obvious signs to look for, and how to effectively remedy those issues without clogging your nostrils as bad as your food disposal trap may be (we would never wish that upon anyone!)
1. Smell
Getting assaulted by scents that can only be described as nasal disrespect can happen if you have too many food remnants lodged in your filter, or worse, pooling up in the area directly above it. These undesirable particles will, over time, spoil and eventually rot, causing horrendous smells to build up, and as you might expect, the worse off it is, the more disgusting it can become.
If food waste is left unattended long enough, you’ll eventually begin attracting the attention of several unwanted guests, or even sicknesses if you continue using the dishwasher after the smell is already noticeable; everything from flies and the brood they leave afterward to household outbreaks of health decline can be what you serve on those unclean plates next if you don’t do something about getting rid of the root cause of that smell.
In most cases, all you’ll need to do is put on some gloves, clear the area leading to the filter itself, and then remove the filter itself, soaking it in your favorite cleaner of choice, and utilizing a brush to ensure all remnants of food are gone, and, more importantly, sniff testing to be sure you aren’t leaving anything up to chance.
2. Standing Water
While bad smells can be easily diagnosed, standing water can also generate disgusting odors, because if there are food particles left in the water (and let’s be honest, if you’ve got standing water, it’s probably due to a buildup of said food), you are essentially making leftover food soup, and while that might sound great in a pot with the right ingredients, things left on plates that have been washed sound far less appetizing, and more life-threatening.
The solution to seeing things as crystal clear as the water should be running through your dishwasher is to scoop everything out, remove the filter, clean it, and run a small test load to make sure the problem is fixed.
If it persists, the issue may go beyond what you can fix without damaging the washer, so call a maintenance specialist, especially if your washer is still under warranty.
3. Gritty Dishes
There are a few reasons why your dishes might be gritty after running them through the washer. For one, the kind of soap or cleaner you are using might not be strong enough for the hearty meal you had on the plate mere moments ago; to that end, you’ll have to do some shopping for something that may break down grease more efficiently, or use a bit more elbow grease and finesse when scraping the dishes before putting them in.
Another root cause for gritty dishes could be small amounts of food buildup in the filter, or the surrounding area, that get flung about while the dishwasher is operating, letting them gently coat the surface area of anything inside and eventually hardening or adhering to the plates and items inside afterward; this is most likely when both bad soaps and buildup are happening in tandem.
4. Not Spraying
The spray arm not functioning can, unfortunately, have a myriad of different causes, anything ranging from an improperly placed utensil coming dislodged and smacking the arm while running, or closing the dishwasher itself too hard and causing one of the nozzles to come loose, perhaps the arm entirely being shifted in a way that doesn’t allow water to flow freely.
Diagnosing this is much harder than the average buildup issue, but not impossible; another possibility is large amounts of food lodged directly in each nozzle, making it impossible for the right amount of water to come out and clearly not cleaning your dishes.
One final issue could be a smaller hose inside the arm that’s damaged and needs repair, but again, this may be outside your expertise and may require someone more knowledgeable to fix.
Difference Between Self-Cleaning vs. Manual Filters
As you might guess, self-cleaning filters are more or less capable of doing everything automatically without you needing to lift a finger for your dishwasher to function fine year-round, with preventative measures in place to keep things going smoothly, and modes that are enabled to fight buildup in real time (think self-cleaning mode, for example)
Alternatively, manual filters are going to need you to get in there and get your hands dirty, or not if you are wearing nitrile gloves; either way, you’ll be responsible for getting the spray arm off, or at the very least getting access to the filter and cleaning it yourself, as well as replacing it afterward.
How Can You Tell if Your Dishwasher Has a Self-Cleaning Filter Option?
In most cases, it is listed as a major selling point on the dishwasher itself. You’ll learn either from a representative if you’re buying in a store or from the machine’s perks when shopping online; however, if you didn’t see either and need to double-check, here’s what to look for.
At first, the center of the tub will have a drain, which is usually where the water goes. Consequently, the filter will be located in this spot; it will usually be placed in such a way that you’ll need specific tools to get it out (not something you’d have lying around the house), or the entire machine will need to be removed and placed on its side to gain access.
Newer models will have buttons that likely say “Self-Clean” or something similar, or the owner’s manual will let you press a specific button combination to trigger a light running-wash function, designed to clean the filter without using extreme amounts of water.
How to Deep-Clean the Rest of the Dishwasher
Well, putting all cards on the table, the interior of a dishwasher is usually cleaned with little to no effort with commercial dishwashing detergents, with most being placed in the soap tray, and having a light load run to completely coat the inside of the washer, which includes the arms and other integral pieces. Still, you can clean more thoroughly with DIY methods, such as the tried-and-true baking soda and white vinegar method or citric acid mixes.
1. Spray Arms
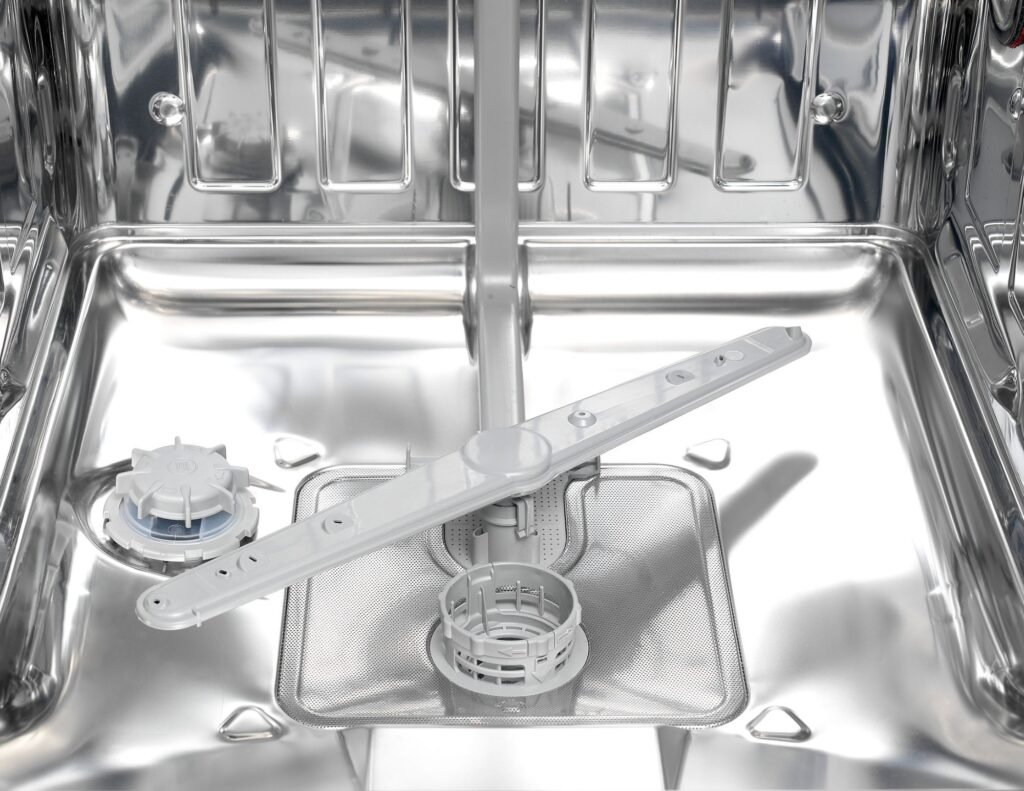
For the more involved method, first remove the trays your dishes and utensils rest on to access the tub floor. Remove the spray arms individually and take time to clean their length; if you can, soak them in your cleaner of choice, or the same DIY mixes we mentioned above. After soaking, use a soft brush to clean every corner of the arms, being careful not to damage the nozzles; replace them as they were, or, better yet, move on to the next steps to clean everything at once.
2. Door Gasket
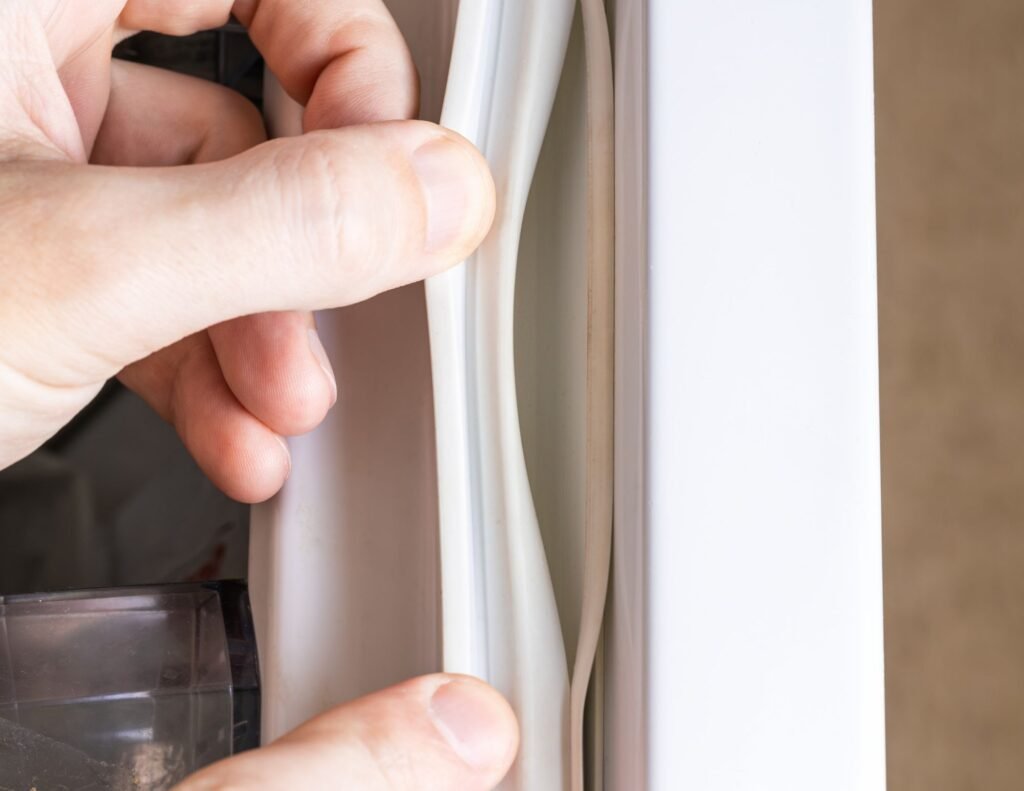
While one might be forgiven for trying to be thorough, cleaning the door gasket is a choice that will likely permanently damage your dishwasher, since heat, force, or detergent can damage the gasket. If you opt to do so with the dishwasher itself, if you wanted to do it by hand, however, you’ll want to remove it and use a very mild soap to avoid anything that may eat away at the gasket itself, being gentle at the same time to prevent damaging it; in most cases, a toothbrush will get the job done. Still, a good rag or sponge should do the job too.

3. Cleaner Tablets
These delightful cleaner tabletstake the guesswork out of cleaning your dishwasher, with most placed directly in the soap or detergent area and breaking down during a wash cycle (most notably during the cleaning cycle). Still, some are marketed for use on a light-load setting, when the dishwasher is empty.
It’s important to note the specific requirements that need to be met for the cleaner tablets to be used, with some needing specific heat ranges to kill certain amounts of bacteria, and others needing to be placed outside the designated soap area; they vary from product to product, but a bit of research before buying them will let you know whether or not they are a good fit for you and should give a basic idea of how to use them without damaging your dishwasher.
When Should You Replace the Filter?
In most cases, you’ll never need to replace the filter itself, as it’s meant to be either automatically cleaned with specific settings, cycles, and other utilities, or manually maintained; routine cleanings are the most common way to keep it up to code.
In some cases, heavy use, general wear, or accidents like dropping the dishwasher can damage your filter and require replacement if it no longer works. In these scenarios, you’ll have no choice but to replace it, and most can be done as easily as removing it and swapping it for a new one.
Auto-cleaning filters, however, can be more challenging, especially with oddities like unreachable screws or specialized equipment needed to reach the internal filter, which may require contacting a professional and paying the associated fee.
Frequently Asked Questions:
1. Why Is It Important to Clean a Dishwasher Filter?
Over time, food residue builds up in the dishwasher, and while you may be able to go beyond the normal cleaning schedule, it can become a health hazard or an annoyance, depending on how much filth builds up inside.
In a best-case scenario, you notice an initial whiff of a bad smell brewing inside the dishwasher; this can be your alarm clock to clean it, but it doesn’t mean you should drop everything and dedicate the day to cleaning. It does mean it’s probably not ideal to use the dishwasher again until the smell, water buildup, or functionality is restored.
2. What Happens If You Don’t Clean a Dishwasher Filter?
As noted above, it becomes a breeding ground for bacteria, which can get anyone exposed to it sick, and later on, flies and maggots can quickly begin infiltrating your kitchen and the surrounding area, carrying with them their own list of disgusting traits and annoying qualities, so it’s better to set some time aside to scrub the dishwasher down, or for automated folks, tossing in a cleaning tablet and calling it a day.
3. What Are Some Dishwasher Maintenance Tips?
Pay very close attention to how your dishwasher sounds when in normal operation, especially when you initially buy it, and even more so when it has been properly installed by someone who is experienced in doing so, as this will serve as your compass rose as to how the machine should look, sound, and function on a normal basis; any deviation from this time period will let you know something is wrong, and you should investigate further.
Foul smells, water buildup, and sprayer arm failure are clear indicators that your dishes are not getting cleaned and definitely shouldn’t be used or eaten off of, as they can get you sick, with the extent of this sickness ranging in severity with how horribly unclean the dishwasher is, with attention to what foods were on the plates and utensils inside. You wouldn’t want to lick a raw chicken breast, but if your dishwasher isn’t working and that cutting board isn’t getting clean, you are likely doing it inadvertently.
Bear in mind, these are simple illnesses you’ll bounce back from; especially if children or elderly people are exposed to these germs and bacteria, there’s no need to fearmonger, but rest assured there can be severe consequences for neglecting cleanliness and eating off tainted plates.
Final Words
Cleaning a dishwasher doesn’t need to be complicated. Neither does cleaning the accompanying filter. Whether the process is automated or you need to remove the filter, soak it in cleaner of your choice, and scrub it a bit, it’s straightforward and almost anyone can do it. Accessing the filter is likely the hardest part.