
Want your food to look as good as it tastes? Plating can transform a simple meal into an eye-catching dish. Here’s how you can start plating like a pro, even as a beginner:
- Use the Rule of Thirds: Divide your plate into a 3×3 grid and arrange your food off-center for a balanced look.
- Apply the Clock Method: Think of your plate as a clock – protein at 6 o’clock, starch between 9-12, and vegetables between 12-3.
- Play with Color and Texture: Combine contrasting colors and textures (like crispy, smooth, and tender) to make your dish stand out.
- Keep Negative Space: Leave 30-40% of the plate empty for a clean, uncluttered presentation.
- Use Basic Tools: Everyday items like spoons, squeeze bottles, and tongs can help you create polished designs.
Start small – try a sauce smear, stack ingredients for height, or group foods in odd numbers. Remember, plating isn’t about perfection; it’s about showing care and making your meals more inviting.
How to ACTUALLY Plate Beautiful Food for Beginners
sbb-itb-663e316
Basic Plating Principles
Here’s how to craft dishes that are not only delicious but also visually captivating.
The Rule of Thirds
Visual balance starts with the rule of thirds. Imagine dividing your plate into a 3×3 grid and placing the main ingredient off-center, avoiding the middle of the plate. This approach draws attention to the dish in a natural way. Food photographer Lauren Short explains:
Placing your subject off-centre and following these lines is more visually pleasing to the eye than a centrally positioned subject.
Positioning your protein on one side of the plate instead of dead center creates a sense of movement and avoids a static look. Negative space – leaving some areas of the plate empty – helps emphasize the dish’s key elements. Interestingly, a study from Oxford University revealed that diners found artfully plated meals tastier compared to the same food presented without thoughtful arrangement.
A good rule of thumb is to let the main element occupy about one-third to two-thirds of the grid. For smaller items like scallops or shrimp, odd numbers – 3, 5, or 7 – tend to be more visually pleasing. These techniques are foundational for creating plates that feel balanced and inviting.
The Clock Method for Placement
The clock method is a straightforward way to arrange food components. Picture your plate as a clock face. Place the main protein at 6 o’clock for a clear focal point. Then, position starchy sides, such as rice or potatoes, between 9 and 12 o’clock, and vegetables between 12 and 3 o’clock.
Silas, Founder of Flavor365, describes this layout:
Imagine your plate as a clock. Place your main protein between 6 and 7 o’clock. Your starch or vegetable between 10 and 11 o’clock. And your additional vegetable or garnish between 1 and 2 o’clock. This creates a natural, balanced flow that feels harmonious to the eye.
This method ensures a clean and organized presentation, making it easy to replicate consistently.
Color and Texture Contrast
Once you’ve arranged your components, focus on color and texture to elevate the dish further. A variety of colors and textures doesn’t just make the plate more appealing – it also signals freshness and can even enhance how flavors are perceived. A colorful dish often suggests a well-rounded, nutritious meal.
Using complementary colors – those opposite each other on the color wheel – can make your dish pop. For example, pair green basil with red tomatoes or orange carrots with purple cabbage.
Thomas Wiswell, Executive Chef at Drift, highlights the importance of visual and textural variety:
There has to be a textural contrast, and you want things to be colorful because people are taking photos with their phones… What you’re putting out there is getting posted.
Aim for at least three distinct textures on the plate. Think of combining a smooth puree, a tender protein, and a crunchy garnish like toasted nuts or crispy shallots. White or neutral-colored plates are ideal for making food colors stand out, while darker plates can add drama to lighter ingredients. To keep vegetables vibrant, blanch them and then cool them in ice water, or lightly roast them to preserve their natural hues.
These thoughtful touches can turn a simple dish into a work of art.
Plating Tools for Beginners
You don’t need a professional kitchen to create stunningly plated dishes. With a few simple tools, you can bring your creative ideas to life and elevate your home-cooked meals. These tools are easy to use and can help you achieve a polished presentation.
Precision Tongs and Spoons
Precision tongs are perfect for placing delicate items like microgreens, herbs, or edible flowers exactly where you want them. They allow you to handle fragile ingredients without damaging them, ensuring every element stays in place. They’re also great for tasks like twirling pasta into neat nests for a more refined look.
Trevor Stinson from Mediocre Chef shares a clever tip for those on a budget:
"The ones I use are from an old precision screwdriver set that I don’t use anymore. I sanitized and cleaned them up, and they’ve been perfect for what I need."
- Trevor Stinson, Author at Mediocre Chef
Saucing spoons, often called precision spoons, are another key tool. Their tapered spouts allow you to apply sauces with accuracy, whether you’re creating small dots, smooth smears, or intricate designs. Angled spoons work especially well for drizzling sauces without disrupting other components on the plate.
Ring Molds and Squeeze Bottles
Ring molds are incredibly useful for adding structure and symmetry to your dishes. Use them to stack ingredients like rice, grains, or vegetables into clean, uniform shapes. They can even double as cutters for items like ravioli or cookies. For best results, lightly grease the inside of the mold to ensure a smooth release.
Squeeze bottles give you precise control over liquid elements like sauces, purees, or oils. They make it easy to create patterns like dots, swirls, or lines that add a professional touch. For a clean presentation, try placing a small amount of sauce on the plate and setting your protein on top, rather than pouring sauce over the entire dish.
Plating Wedges and Pastry Bags
Offset spatulas are a must-have for careful plating. Their slight bend makes it easy to lift delicate items like fish fillets without breaking them. They’re also handy for creating clean streaks or bases of sauce on the plate.
Pastry bags (or piping bags) are perfect for adding texture and height to your dishes. Use them for soft foods, purees, or desserts to give your plate a polished finish. Another versatile tool is a mesh sieve, which can strain sauces for a smooth consistency or sift powdered sugar for decorative touches.
Jay Fisher, Executive Chef at Desiignbyfood, highlights the importance of presentation:
"If it looks beautiful, 99 percent of the time, it tastes as good as it looks."
3 Simple Plating Techniques
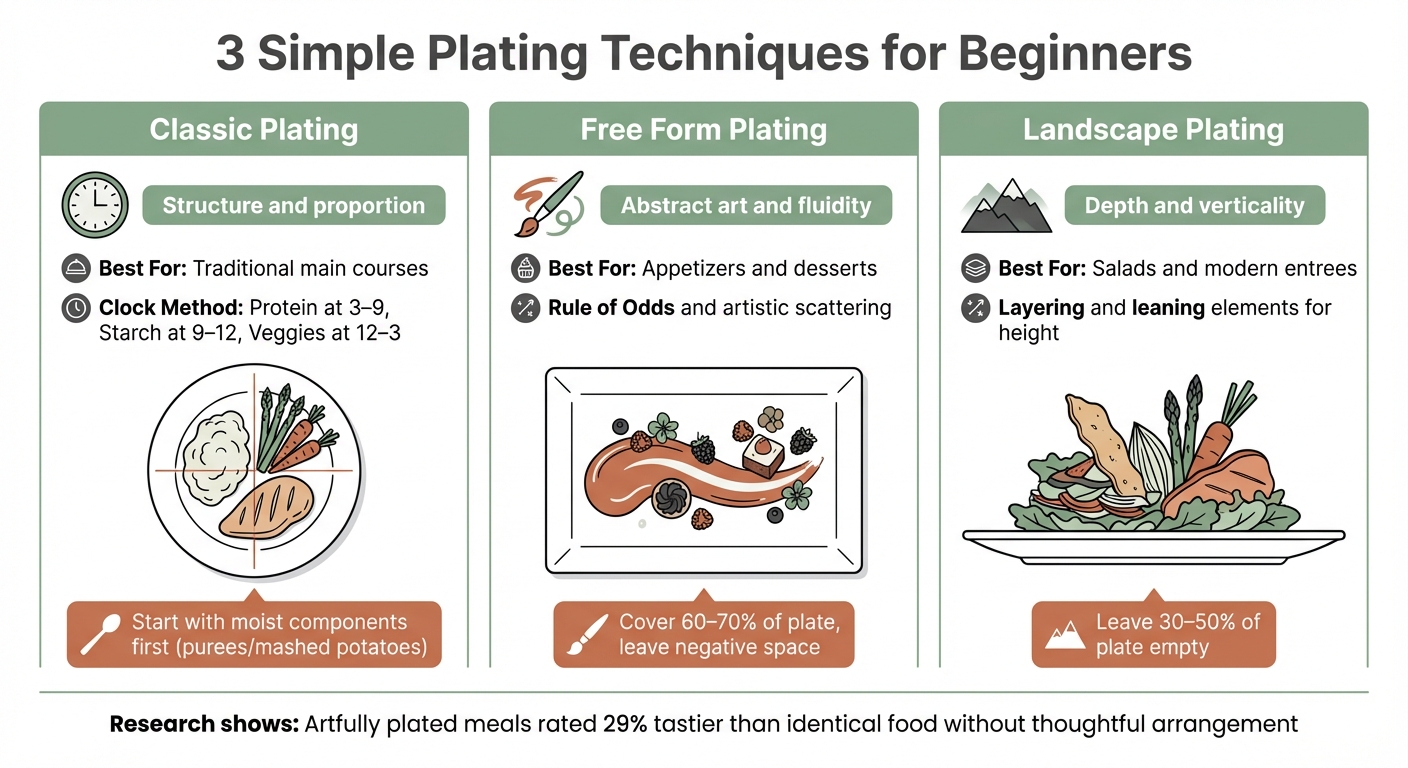
3 Essential Plating Techniques for Beginners: Classic, Free Form, and Landscape Styles
Once you’ve gathered the right tools, it’s time to bring your plating skills to life. Here are three distinct approaches to arranging food on a plate, ranging from structured and traditional to more relaxed and modern styles. Each method offers a beginner-friendly way to elevate presentation.
Classic Plating
Classic plating takes a structured and methodical approach, making it an easy starting point. Using the Clock Method, arrange your plate with protein between 3:00 and 9:00, starch between 9:00 and 12:00, and vegetables between 12:00 and 3:00.
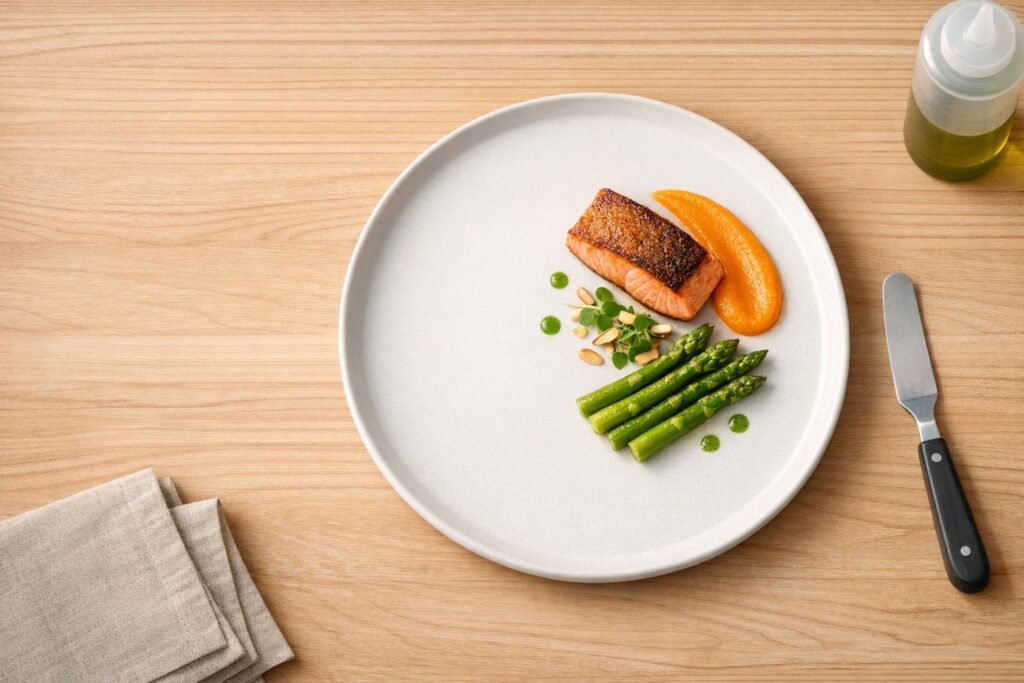
Start by plating moist components like purees or mashed potatoes first. These elements act as an anchor, holding the rest of the food in place. For a polished look, use a pastry bag to pipe the puree into its section. Next, carefully place vegetables with precision tongs, and position the protein on the lower half of the plate. Leaning the protein against the starch or vegetables adds visual height and dimension.
If you’re serving sliced meat, fan the slices to highlight the meat’s doneness. Finish the dish with a drizzle of sauce applied using a squeeze bottle, and clean the plate’s rim with a towel to remove any stray marks.
This technique is perfect for traditional dishes, like filet mignon paired with potato puree and carrots. Research from Oxford University even found that diners rated a salad plated like a painting 29% better in taste than the same ingredients presented without care. They were also willing to pay nearly three times as much for the well-plated version.
While Classic Plating focuses on structure and balance, Free Form Plating offers a more artistic approach.
Free Form Plating
Free Form Plating transforms your plate into a creative canvas. Instead of following rigid guidelines, this style encourages artistic expression – perfect for appetizers and desserts with delicate or intricate components.
One popular technique is the spoon smear, where you place a dollop of thick sauce or puree on the plate and drag the back of a spoon through it in one smooth motion. To enhance the design, you can add accent dots or lines of sauce using a squeeze bottle. Keep the arrangement clean and uncluttered by connecting elements with these artistic touches.
For balance, use the Rule of Odds by grouping items in threes or fives. Aim to cover about 60%–70% of the plate, leaving negative space to draw attention to your presentation. This approach emphasizes visual balance and creates a modern, elegant look.
"This technique resembles abstract art." – BigOven Editorial
If Classic Plating is about precision and Free Form Plating is about fluidity, Landscape Plating takes inspiration from nature by focusing on depth and height.
Landscape Plating
Landscape Plating emphasizes building upward and creating layers, adding depth and height to your presentation. Start with a base, like a mound of puree or mashed potatoes, to anchor the dish.
The leaning technique is key here. Position long vegetables (like asparagus or carrots) or slices of protein (such as steak or duck breast) at an angle against the base to create visual interest. Layer each ingredient to maintain distinct colors and textures, following the principles of contrast.
Add a sweeping line of sauce with the back of a spoon to form a ground layer, then finish with a sprinkle of microgreens or herbs for a natural, earthy touch. Leave about 30%–50% of the plate empty to avoid overcrowding and ensure the dish looks intentional and refined.
This method works wonderfully for salads and modern entrees, offering a presentation inspired by nature that contrasts with the more structured look of Classic Plating.
| Plating Style | Core Concept | Best For | Key Arrangement Rule |
|---|---|---|---|
| Classic Plating | Structure and proportion | Traditional main courses | Clock Method: Protein at 3–9, Starch at 9–12, Veggies at 12–3 |
| Free Form Plating | Abstract art and fluidity | Appetizers and desserts | Rule of Odds and artistic scattering |
| Landscape Plating | Depth and verticality | Salads and modern entrees | Layering and leaning elements for height |
Common Plating Mistakes to Avoid
Even with solid techniques, certain missteps can take away from your dish’s presentation. Avoiding these common errors can help you maintain a balanced and polished look for your plates.
Overcrowding the Plate
An overfilled plate can feel chaotic and detract from the appeal of individual elements. When components are packed too tightly, they visually blend together, reducing the dish’s overall impact. For a clean and elegant look, aim to cover only 60–70% of the plate, leaving 30–40% as negative space to frame your food. As Silas, Founder of Flavor365, puts it:
Negative space is the empty area around your food. It gives your dish room to breathe, prevents it from looking cluttered, and directs the diner’s eye to the star of the show.
To check your spacing, try the fork test: when a fork rests on the plate’s edge, its tines shouldn’t touch any food. You can also stack or layer ingredients to create height and avoid overcrowding.
Too Much Symmetry
Perfect symmetry can make a plate feel rigid and unexciting. Instead, consider using the Rule of Thirds – position the main component off-center for a more dynamic layout. When arranging smaller items, group them in odd numbers, like threes or fives, as these tend to be more visually appealing. This technique adds a touch of natural tension while maintaining balance.
Wrong Plate Size
The plate you choose can make or break the presentation. A plate that’s too large might make your dish look sparse, while a plate that’s too small can feel cramped and messy. Think of the plate as the frame for your food – selecting the right size ensures the dish looks complete and inviting.
For smaller portions, stick to smaller plates, while larger dishes, like a 16-oz steak, call for full-size dinner plates. Ideally, aim for one-third to one-half of the plate to be covered with food. Plates with wide rims naturally create more negative space, and white porcelain plates work well for highlighting most foods.
| Mistake | Visual Effect | Quick Fix |
|---|---|---|
| Overcrowding | Messy and cluttered | Leave 30–40% of the plate empty; use the fork test |
| Too Much Symmetry | Stiff and static | Apply the Rule of Thirds; use odd-number groupings |
| Wrong Plate Size | Lost or cramped look | Match plate size to the portion; aim for 1/3 to 1/2 coverage |
Conclusion
Mastering the art of plating is entirely achievable with the right approach. By focusing on key principles like balanced arrangements, thoughtful use of negative space, and striking contrasts, you can instantly transform the look of your home-cooked meals.
Practice is essential – take photos, try new techniques, and remember the golden rule: "Food tastes better when it looks good". Even the simplest meals offer a chance to refine your plating skills and develop your creative instincts.
You don’t need fancy tools to achieve beautiful results. A few basics like white plates, a squeeze bottle, and a clean cloth can go a long way in creating a polished presentation. Just ensure your plating process doesn’t delay serving or compromise the food’s freshness.
Start small. Try one new technique at a time – maybe a sauce swoosh or a neatly grouped arrangement of vegetables. Each attempt will help you build confidence and an eye for detail. The goal isn’t flawless perfection; it’s about showing care and making each dish feel intentional, turning everyday meals into a feast for the eyes.
FAQs
How do I pick the right plate size for my portion?
When plating your food, pick a plate that matches the size of your portions to create a visually balanced presentation. For smaller portions, opt for smaller plates to avoid making the food look lost. Larger servings, on the other hand, need bigger plates to prevent overcrowding. Leave some empty space around the food to draw attention to the dish itself. You can also stack or layer components to add height and make the presentation more dynamic. The key is to keep the plate attractive while ensuring the food remains the center of attention.
What are the easiest plating tools to start with at home?
For beginners, the simplest tools to get started are white porcelain plates, serving spoons, and forks. White plates create a clean, neutral backdrop that makes your food stand out, while basic utensils make it easier to arrange and present dishes neatly. These essentials are affordable and practical, giving you the freedom to practice plating techniques without investing in expensive or specialized equipment.
How can I add height without messing up the food?
To give your dish more height while maintaining its visual appeal, focus on stacking or layering ingredients with care. Use tools like tweezers or small spoons to ensure precision and stability. Avoid overcrowding the plate to keep the composition balanced. By thoughtfully layering, you can add depth and make the dish look refined, allowing each component to shine.