
Want to keep your small kitchen appliances running smoothly and lasting longer? Regular maintenance and proper care are key. Here’s a quick summary of how you can protect your investment and ensure your appliances stay in top shape:
- Clean regularly: Wipe surfaces, wash food-contact parts, and prevent residue buildup.
- Inspect cords: Look for frayed wires or damage to avoid fire or shock risks.
- Check filters: Clean or replace filters in coffee makers, air fryers, and range hoods as recommended.
- Inspect seals and hoses: Prevent leaks by checking gaskets and connections.
- Clean blades and attachments: Hand-wash removable parts to avoid dull edges or bacteria growth.
- Avoid overloading: Stick to capacity limits to prevent motor strain and overheating.
- Follow manufacturer instructions: Use approved cleaning products and follow safety guidelines.
- Store properly: Keep appliances dry and in enclosed spaces to avoid dust and moisture damage.
- Ensure stability: Place appliances on level surfaces to reduce wear and tear.
- Schedule professional maintenance: For high-end models, annual checkups can catch issues early.
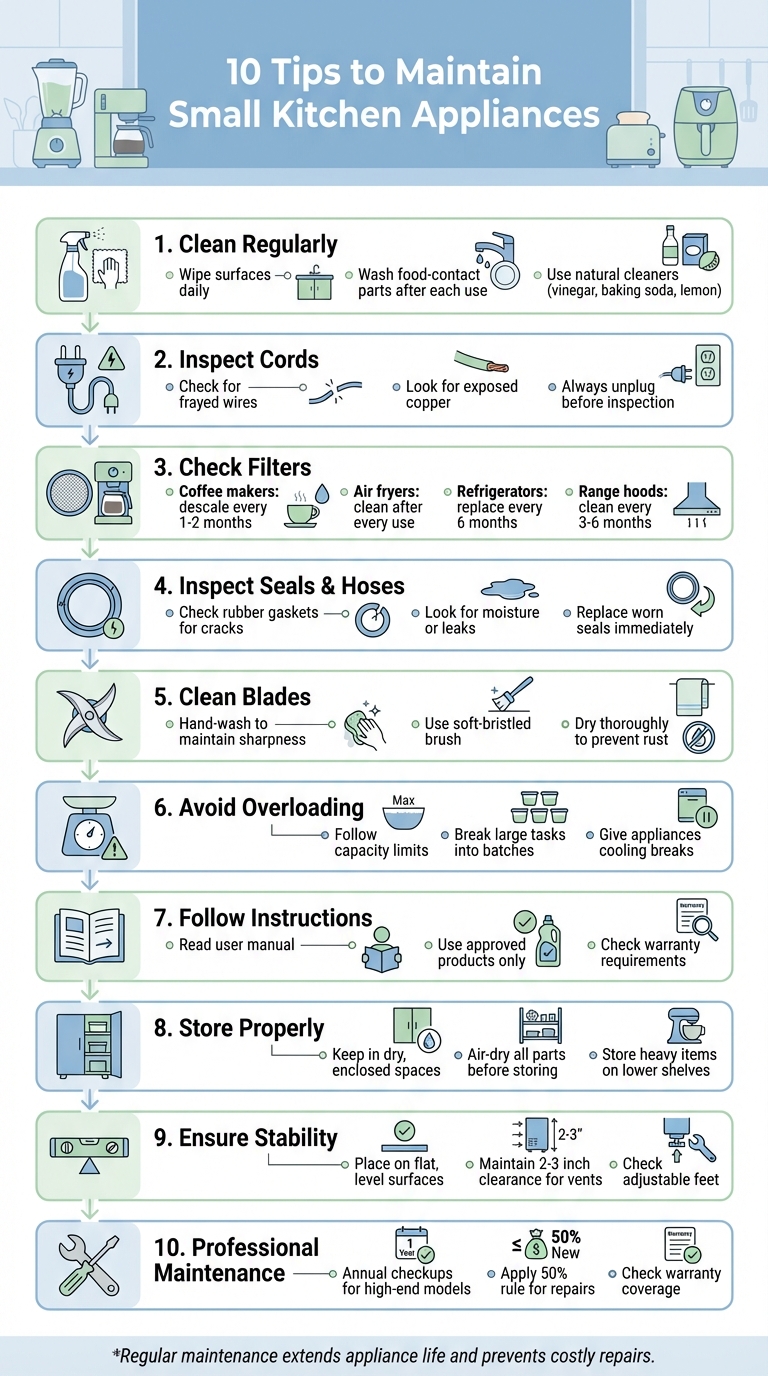
10 Essential Tips for Maintaining Small Kitchen Appliances
Here’s how to keep small and large appliances fresh & functional
sbb-itb-663e316
1. Clean Appliances Regularly to Remove Dust and Debris
Appliances can quickly gather dust, crumbs, and other particles, which might impact how well they work. To keep things running smoothly, clean surfaces and wash food-contact parts like blender jars, coffee carafes, and air fryer baskets after each use. This helps prevent bacteria from growing and avoids cross-contamination. Once the inside is spotless, give some attention to the exterior.
For the outside, wipe surfaces daily with a damp microfiber cloth to clear away grease and fingerprints. To tackle small areas like buttons and knobs, dip a soft toothbrush in soapy water and scrub gently.
"The worst thing you can do is allow the mess to build up and end up sticky, grimy, and stuck, which can also attract insects."
– Danielle Ramos-Sullivan, Author, House Digest
Before cleaning, always unplug the appliance and let it cool down. Use a damp cloth for motorized or electrical parts to avoid any damage.
To finish up, try natural cleaners like distilled white vinegar, baking soda paste, or lemon juice to cut through grease and eliminate odors. A microfiber cloth works great for polishing stainless steel, leaving it shiny and lint-free. For those tricky crevices, toothpicks or cotton swabs can help you get into the tightest spots.
2. Check Power Cords for Damage
In a bustling kitchen, power cords often endure heavy wear and tear. Unfortunately, this makes them a common culprit behind electrical fires and shock risks. Signs like frayed insulation, exposed copper wires, or a stiff, brittle coating mean it’s time to replace the cord.
Before you even think about inspecting a power cord, make sure the appliance is unplugged from the wall outlet. Simply switching it off isn’t enough – electricity can still flow through a plugged-in device.
"Despite being in the ‘off’ position, a small appliance that is still plugged into an electrical outlet can still pose the risk of creating electric shocks."
– Kristeen Cherney, Author, House Digest
Once the appliance is unplugged, carefully examine the cord from end to end.
Run your fingers along the cord to feel for cracks or areas where the insulation has become stiff or brittle. Pay special attention to the points where the cord connects to the plug and the appliance. If you notice the power cuts out when you flex the cord in these areas, the internal copper wires could be damaged. Also, watch for blackened spots – these could indicate overheating or a short circuit.
If you find any damage, replace the cord with one that matches the proper gauge and rating. Appliances with heating elements usually require thicker cords, such as 12- or 14-gauge wires, while smaller devices with motors can typically use 16- or 18-gauge wires. Avoid using electrical tape to patch damaged cords – it’s not a safe solution.
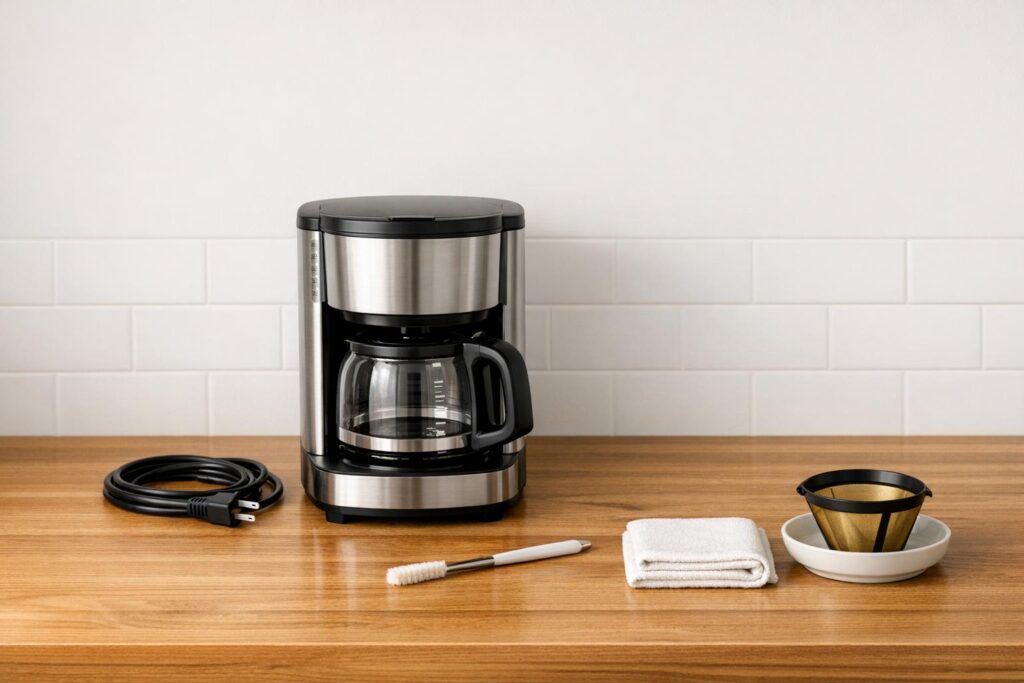
3. Clean or Replace Filters as Recommended
Filters are essential for catching coffee grounds, grease, and other debris, but when they get clogged, your appliances have to work harder. This not only slows them down but can also shorten their lifespan.
For coffee makers, it’s a good habit to rinse reusable filter baskets with warm, soapy water after every use. If you’re using paper filters, toss them out after each brew. To keep things running smoothly, descale your coffee maker every one to two months. Use a mix of equal parts white vinegar and water, run half a brew cycle, let it sit for 30–60 minutes, then finish the cycle. Follow that up with two to three cycles of fresh water to rinse everything out properly.
Air fryers also need regular attention. Their baskets and grates can trap grease and food debris, which can lead to unpleasant odors or even cross-contamination. Clean these parts after every use. For tough residue, try adding a cup of water to the basket and running the air fryer on high for a few minutes. The steam will help loosen any stubborn buildup.
Other appliances, like refrigerators and range hoods, have their own filter schedules. Replace refrigerator water filters about every six months. For range hood grease filters, clean or replace them every three to six months, especially if you cook frequently. Always check your appliance’s manual for specific recommendations. Some brands, like Keurig, may require certain cleaning solutions to maintain the warranty.
"For the majority of our small appliances, we evaluate how easy each model is to clean. In some cases, the time spent cleaning the appliance may be longer than the time you spent using it."
– Ginny Lui, Engineer, Consumer Reports
4. Inspect Hoses and Connections for Leaks
In addition to cleaning and maintaining filters, it’s crucial to routinely check seals and connections to catch any leaks early.
For blenders and food processors, pay close attention to the rubber gaskets and seals, especially where the jar connects to the base and around the blade assembly. These areas are prone to leaks, which can lead to messy spills or even motor damage.
Disassemble the jar and carefully inspect the gasket. Look for cracks, thinning, or signs that it has lost its elasticity. Check for any moisture or dried food residue around the base and coupling. If you’ve tightened the base securely but leaks still occur, it’s time to replace the gasket.
"The two most important steps an operator can take are not to overload the blender and to keep the seals tight."
– Fix-It Club
If the motor is running but the blades aren’t turning, take a look at the drive stud. Wear and tear on this part can cause issues. Use a wrench to tighten the drive stud on the shaft by turning it clockwise. While you’re at it, use a soft toothbrush to clean any food buildup in the blade assembly crevices.
Once you’ve reassembled everything, unplug the appliance and test it by running plain water for about 10 seconds. If you notice any moisture, wipe down the motor base immediately to prevent damage.
5. Clean Blades and Attachments Thoroughly
Once you’ve checked hoses and seals, it’s time to focus on cleaning blades and attachments. This step is crucial to avoid food buildup, which can lead to bacteria growth and affect your appliance’s performance. After each use, disassemble removable parts like blades, beaters, and attachments to clean away any stuck-on residue. For blenders and food processors, take apart the jar, lid, blade assembly, and rubber gaskets. If you’re working with a stand mixer, detach the beaters and any other removable attachments. This quick step makes the more detailed hand-washing process much easier.
Before you start disassembling, make sure the appliance is unplugged. A helpful pre-cleaning trick for blenders is to fill the jar halfway with warm, soapy water and run it on high for 15–30 seconds. This loosens dried food and reduces the effort needed for manual scrubbing.
Even if parts are labeled dishwasher-safe, hand-washing blades is a better option. Dishwasher detergents can dull the edges over time. Stick to mild dish soap, warm water, and a soft-bristled toothbrush to clean around sharp edges and tight spaces. For stubborn grime, mix a little baking soda with water to create a paste, then scrub gently with an old toothbrush. Cotton swabs are great for reaching into narrow slots, like those on stand mixer beaters.
"To retain the sharpness of the blades, do not wash the blender’s assembly in the dishwasher."
– Editors of Consumer Guide, HowStuffWorks
Avoid soaking sharp blades in soapy water, as this creates a safety hazard. Instead, rinse them immediately after use with warm water to prevent food from drying and sticking. Once cleaned, dry the blades thoroughly with a soft towel to avoid rust and water spots. This extra step ensures your appliances remain in top condition.
6. Avoid Overloading Appliances
Once your appliances are clean and in good working order, it’s just as important to use them correctly. One key rule: don’t overload them. Pushing an appliance beyond its capacity forces the motor to work harder than it’s designed to, which can cause it to overheat. This extra strain can damage critical components like bearings, seals, and drive belts, making them wear out faster.
"Overloading puts strain on the machine’s motor and drum. When these parts are forced to handle extra weight, they wear out faster."
– Nora Jaymes, Expert, Dick Van Dyke Appliance World
Overloading isn’t just bad for the appliance – it can also be dangerous. It increases the risk of overheating wires, which can lead to short circuits and even fires. In fact, electrical issues in U.S. homes caused significant property damage and loss in 2021.
To avoid these problems, always check your appliance’s maximum capacity. If you notice burning smells, strange noises, or excessive heat, stop and lighten the load immediately. For large tasks, break them into smaller batches. For example, when using a blender, add ingredients in this order: liquids first, then soft items, and finally hard or frozen ones. This method ensures a smoother blend and reduces motor strain. And if you’re using an appliance for a long time, give it breaks to cool down.
7. Follow Manufacturer Instructions for Proper Use
After tackling cleaning and maintenance tips, it’s equally important to stick to the manufacturer’s instructions to keep your appliances in great shape.
The user manual is your go-to resource for protecting both your appliance and yourself. Each device comes with specific guidelines, and ignoring them can lead to damage, voided warranties, or even safety risks.
Take coffee makers, for instance. Most warranties won’t cover damage caused by non-approved pods or cleaning products. Using an off-brand descaling solution might harm internal seals and nullify your warranty altogether.
These manuals also flag unsafe practices, like forgetting to unplug an appliance before cleaning – a mistake that could be dangerous. Another example is blender blades. Some manufacturers specifically recommend hand-washing them to avoid dulling, as dishwasher detergents can cause damage if machine washing isn’t advised.
Lost your manual? No problem. Brands like Kenmore provide online tools where you can search for and download a digital copy using your appliance’s model number (usually 11 characters or more). Once you have it, pay close attention to sections labeled “WARNING” or “NOTE.” These highlight actions that could lead to immediate damage or safety concerns.
8. Store Appliances in a Dry, Clean Place
Storing your appliances correctly can keep them free from dust, grease, and other buildup. Enclosed storage options like cabinets, pantries, or appliance garages are great for shielding your equipment from grime that can wear down surfaces over time. And don’t forget – keeping appliances dry is just as important to avoid moisture-related issues.
Moisture can lead to bacteria growth, corroded parts, and even damage electrical components, which might increase the risk of shocks. Make sure all removable parts – like blades, lids, jars, and reservoirs – are completely air-dried before putting them back together. For example, leaving the reservoir lid open on a coffee maker between uses allows the internal tubing to dry properly.
When organizing, store heavier appliances (like stand mixers) on lower shelves to prevent accidents. Lighter, less frequently used items (like bread makers) can go on higher shelves. To make deep cabinets more functional, consider adding pullout shelves or Lazy Susans. These are especially handy for round appliances like air fryers and rice cookers, keeping them both accessible and safe.
Before putting appliances away, wipe down the base and power cord with a damp cloth to remove oils or food particles that could attract dust or pests.
9. Place Appliances on Stable, Level Surfaces
After proper storage, make sure your appliances are set up correctly on your countertop.
Placing appliances on flat, stable surfaces isn’t just about keeping your kitchen neat – it’s essential for their performance and durability. Unsteady placement can lead to excessive vibrations, which strain internal components and increase the risk of mechanical failure. This is especially true for high-vibration devices like blenders. Wobbly or uneven appliances are also more likely to tip over, potentially damaging the unit or causing injuries.
"When appliances are not level, they can experience uneven wear and tear, leading to potential malfunctions and reduced efficiency." – KitchenAid
To ensure your surface is level, you can use your smartphone. On an iPhone, open the "Measure" app, select "Level", and look for a green display showing "0°." Android users can download a free bubble level app from the Google Play Store. For the most accurate results, remove any bulky phone case and check the surface in all directions.
For appliances with air vents, like microwaves or compact refrigerators, maintain a clearance of two to three inches around them. This allows for proper airflow and prevents overheating. Keeping appliances in fixed positions also reduces stress on cords. To make managing power easier, consider using a power strip – this lets you cut power to multiple devices with a single switch.
If your countertop is level but an appliance still wobbles, check its adjustable feet. Many small appliances have these, and a quick adjustment can ensure the unit sits evenly. This simple fix helps avoid unnecessary wear and keeps your appliances operating smoothly.
10. Get Professional Maintenance When Needed
Even with regular cleaning and careful use, some appliances eventually need professional attention to keep running smoothly. While routine care can prevent many problems, professional maintenance tackles deeper issues that home upkeep can’t address.
Sometimes, even well-cared-for appliances need expert servicing. Professional checkups can extend the life of your appliances and improve energy efficiency, making them a smart investment for high-end models like mixers or premium coffee systems. Scheduling annual inspections for these appliances is a practical way to prevent costly repairs down the line.
"For more complex tasks, yearly professional maintenance is key to avoiding costly repairs and ensuring your appliances stay in top shape." – Lyle Weischwill, Sears Home Services
A good rule of thumb is the 50% rule: if repairing an appliance costs more than half the price of replacing it, it’s usually better to buy a new one. For lower-cost appliances, professional servicing might not be worth it. But for premium models, annual maintenance can be a smart choice[36,37].
Before scheduling repairs, check your appliance warranty. Many high-end units come with long-term coverage that might include professional maintenance. When hiring a technician, look for someone with specialized expertise who can perform detailed inspections. These often include tightening electrical connections, calibrating temperatures, and checking for internal issues like clogs or leaks.
Avoidable appliance repairs cost American households over $500 annually. By scheduling professional inspections every year for your valuable or complex appliances, you can catch potential problems early, ensuring they stay efficient and safe for years to come.
Conclusion
Taking simple, routine steps to care for your small appliances can make a big difference in their lifespan and safety. Regular maintenance helps prevent motor burnout, reduces fire hazards caused by grease or crumbs, stops bacteria from growing, and keeps food residue from attracting pests. Given that most people spend hundreds – if not thousands – of dollars on small kitchen appliances over the years, putting in a little effort to maintain them is a smart way to protect your investment.
Consistent care doesn’t have to be complicated. Cleaning appliances right after use prevents grease from hardening, while setting monthly reminders for tasks like descaling coffee makers or checking power cords ensures nothing gets overlooked. As Ginny Lui, an engineer at Consumer Reports, wisely notes:
"In some cases, the time spent cleaning the appliance may be longer than the time you spent using it".
The key is to tackle small tasks regularly instead of letting messes build up. Following the 10 tips outlined earlier can help keep your appliances running smoothly for years to come.
By staying on top of maintenance, you can avoid costly repairs, delay replacements, and ensure your appliances operate efficiently. Plus, even when turned off, appliances can still draw power, quietly adding to your electricity bill. Regular care not only saves money but also keeps your kitchen running smoothly.
For more advice on appliance care, cleaning tips, and answers to common kitchen questions, check out Comfy Kitchen. Their step-by-step guides make it easy to keep your kitchen in great shape.
FAQs
How do I know when an appliance cord is unsafe?
An appliance cord becomes a safety hazard when it’s frayed, cracked, damaged, or has exposed wires. These problems can result in electrical shocks, fires, or short circuits, putting both people and property at risk. Make it a habit to check cords regularly, and if you spot any of these warning signs, replace the cord right away to keep things safe.
What’s the easiest way to stop blender leaks?
To avoid blender leaks, ensure the lid is firmly secured before use. Check the gaskets or seals regularly for any signs of wear or damage, and replace them as needed to keep the seal tight and effective.
When is it worth paying for professional maintenance?
If your appliance starts acting up, requires more than just a quick clean, or has complicated issues that might be unsafe, it’s a good idea to look into professional maintenance. Tackling these problems early can save you from expensive fixes later and keep your small kitchen appliances running longer.